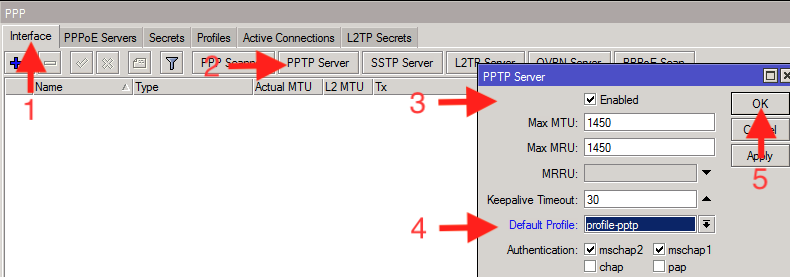
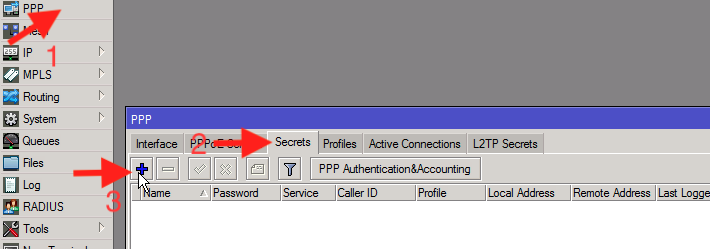
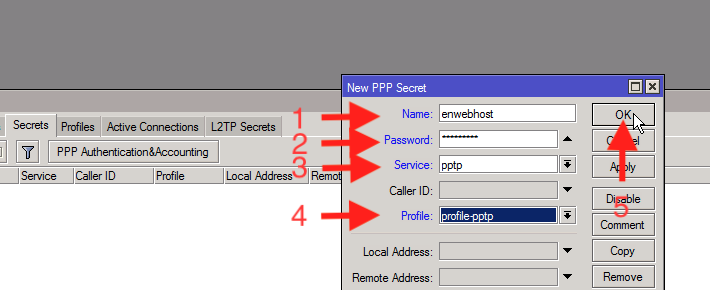
MikroTik PPTP VPN Server Configuration

Winbox is a configuration utility under Windows which can be used to connect to MikroTik CHR via IP protocol. Latest winbox version can be downloaded from MikroTik download page.


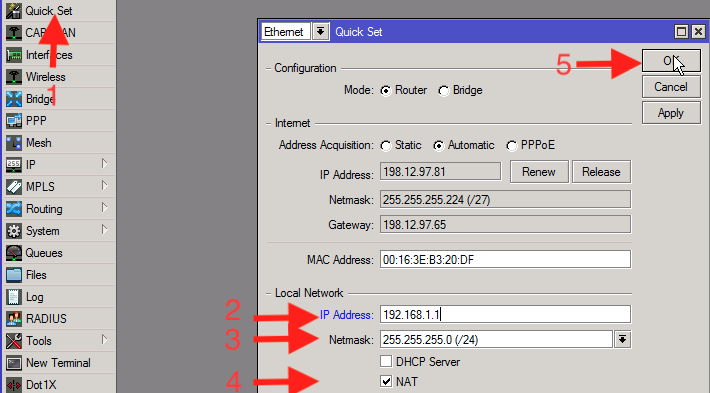
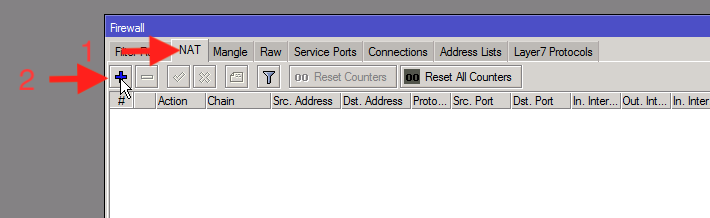
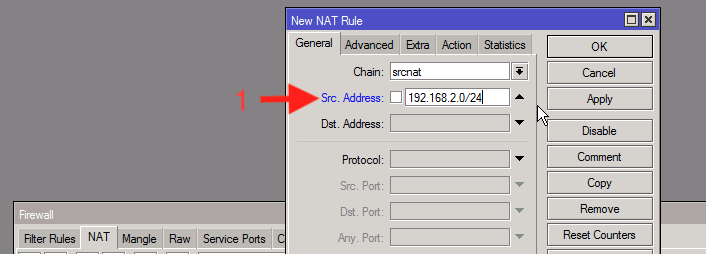
Choosing Local Network and enable NAT

1. Press “Quick Set” in the left menu

2. In “Local Network”, write “192.168.1.1” in the “IP Address” field

3. Select a subnet such as “255.255.255.0/24” in the “Network” field

4. Check “NAT” to enable it

5. Press “OK”


Adding an IP Pool for Remote Users

1. Press “IP” and them “Pool” in the left menu


2. Press “+” sign in “IP Pool” window

3. Choose a name such as “pool-pptp”

4. Write “192.168.2.0/24” in the “Addresses” field

5. Press “OK”


Creating a Firewall Rule for Remote Addresses

1. Press “IP” and them “Firewall” in the left menu


2. Press “NAT” tab in “Firewall” window

3. Press “+” sign


4. In the “Src. Address” field, write “192.168.2.0/24” in “General” tab


5. Navigate to “Action” tab and select “masquerade” in the “Action” field

6. Press “OK”


Creating a PPTP Profile

1. Press “PPP” in the left menu

2. Navigate to “Profiles” tab in the “PPP” window

3. Press “+” sign


4. Choose a name such as “profile-pptp” in the “Name” field

5. Write “192.168.1.1” in the “Local Address” field

6. select “pool-pptp” in the “Remote Address” field

7. Press “OK”


Enabling PPTP Server

1. Navigate to “Interface Tab”

2. Press “PPTP Server”

3. Check “Enabled” to enable PPTP Server

4. Select “profile-pptp” in the “Default Profile” field

5. Press “OK”


Creating Login Credentials for Remote Users

1. Press “PPP” in the left menu

2. Navigate to “Secrets” tab in the “PPP” window

3. Press “+” sign


4. Write username of your choice in the “Name” field

5. Write password of your choice in the “Password” field

6. Select “pptp” in the “Service” field

7. Select “profile-pptp” in the “profile” field

8. Press “OK”